Hour-long blogging marathons may be effective, but they’re often not the most efficient use of your time.
You don’t always have an hour to spare, and unfortunately, if you don’t blog regularly, it’s difficult to create a ton of content for one page.
Whether you need blog posts for your company website or social media, you’ll want the right amount of content that fits with your brand strategy.
Time is money – and while writing blog posts may not involve much monetary investment, it takes time away from other important tasks.
Today, let’s look at how to write a blog post with Rytr AI – quickly and easily.
- Create a Rytr Account
- How to Structure Your Rytr Files & Folders
- Creating Blog Topics Using Rytr
- Picking the Topic
- Scoping Out the Competition
- The Anatomy of a Blog Post
- Starting the Blog Post in Rytr
- Writing Paragraphs in Rytr
- Use Cases that Work the Best for Blogs
- Checking for Plagiarism
- Creating Supporting Graphics
- Selling and Sharing Content with Your Rytr Profile
- Additional Tips for Writing Your Blog Posts with AI
What is Rytr?
Rytr is a blog writing software that is able to produce high-quality content from scratch. It can also be used as a content generation tool for bloggers or business owners who don’t have enough time to write content themselves.
Rytr is a power-user tool for people who want to create high-quality blogs and articles in a fraction of the time it would take them doing it manually.
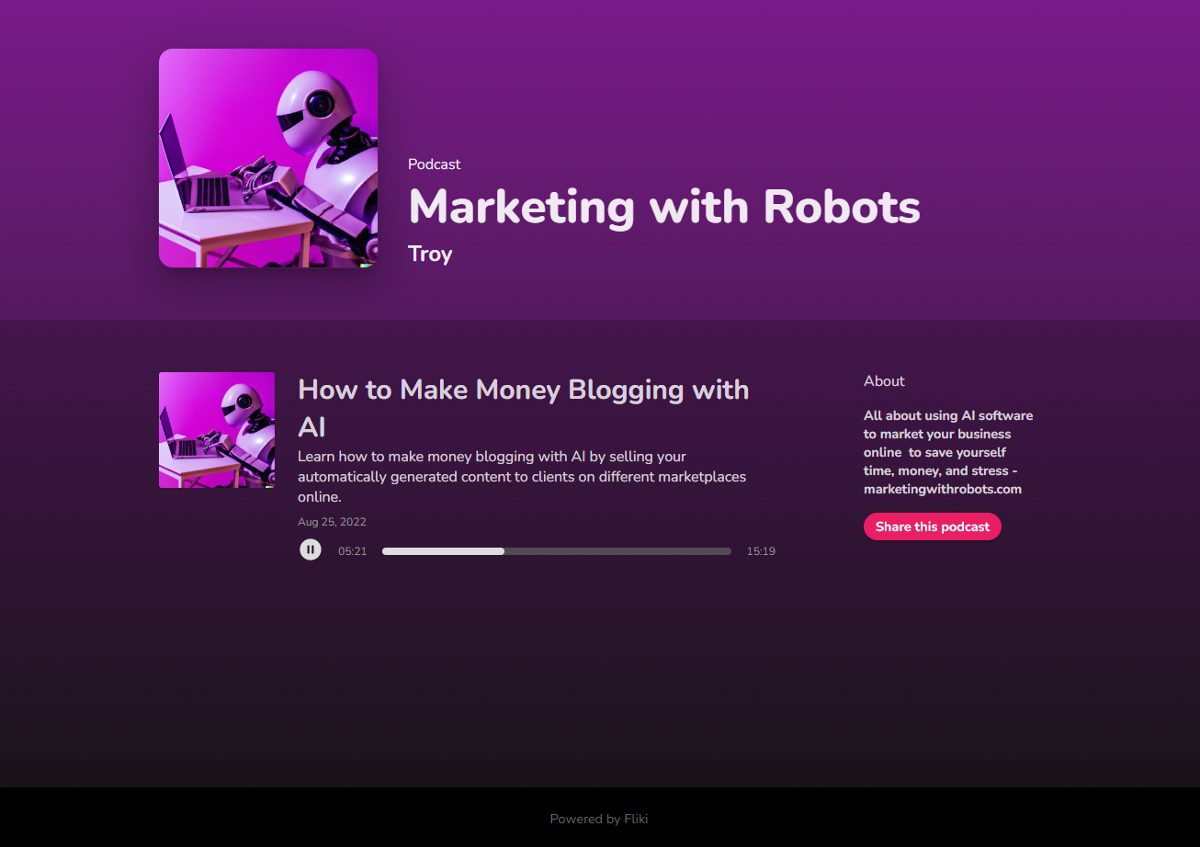
Rytr is recognized by Marketing with Robots as one of the best blogging tools on the market.
The blog writing software has been designed for both beginners and experts alike. It allows users to create fresh new content with just a few clicks of their mouse. There are even templates that allow you to choose from over 30+ use cases and 20+ languages.
If you don’t know about Rytr, check out our full review here. If you are already an avid user or interested in knowing how you can use Rytr to quickly bust out blog posts, read on.
How to Write Your First Blog Post with Rytr
This tutorial will explain how to write your first blog post with Rytr.
We will show you:
- How to create your Rytr account
- How to structure your files and folders within the Rytr platform
- The basic components of a blog post
- Best ‘use cases’ for blog post content
- Selecting the proper ‘tone’ for each sections
- How to use the built-in plagiarism checker
- Using the ‘magic command’ function
- How to sell and share your blog posts with your Rytr profile
Create a Rytr Account
The first step is going to be to create a Rytr account if you haven’t already.
There are 3 plans to choose from: Free, Saver, and Unlimited.
You can start for free and generate up to 5000 characters per month.
However, you can blow through your character limits quickly as a beginner if you aren’t careful.
Here at Marketing with Robots, we’re proud to recommend the Unlimited plan for only $29 a month, where you’ll never worry about character limits again.
Choose your pricing plan here and let’s get started.
How to Structure Your Rytr Files & Folders
Keeping your files and folders organized inside the Rytr app from the start will save you a lot of time searching and trying to find the documents you need.
It’s best to do your organizing from the beginning so you don’t need to move all of your files and folders around later.
Depending on your use case and how many companies or websites you will be writing for, you may have a need to have a separate folder for each company or project.

Creating Blog Topics Using Rytr
There are multiple ways that you can come up with blog topics from scratch using the built-in AI in the Rytr app.
One of our favorite ways of coming up with blog topics in a flash is by using the ‘Magic Command’ function.
Let’s go over how to use Magic Command to come up with an infinite amount of great blog topics for any industry.

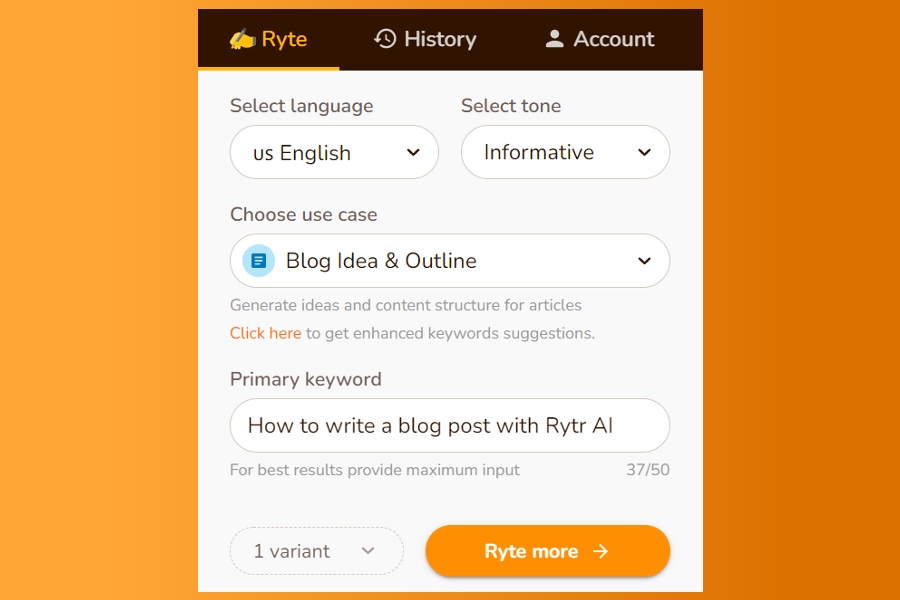
1) Select Language
First, choose which language you want your blog post written in. This is going to be your target audiences language, however you could also consider writing articles in other languages to rank in different Google searches. English is one of the most competitive language in Google Search.
2) Select Tone
Next, select a tone of voice for your blog posts. Try to choose a tone of voice that will match the intent of the blog posts you would like to write, as well as your brand voice and what your target audience expects.
The following tones I have found to be the most consistent based on your intent:
Compassionate: Great for topics and writing on divisive topics
Convincing: Perfect for calls to action, sales pages
Informational: For writing informational pieces, how-tos, tutorials
Formal: Good for authoritative and more professional sounding text
Cautionary: For warnings, criticisms, and helpful-to-reader topics
Tweak around with your tone of voice and see what kinds of different results you can get.
3) Choose Your Use Case
For this example, we will be using the ‘Magic Command’ function from the ‘Use Case’ dropdown list. An alternative method for coming up with your blog post topics would be to select the ‘Blog Topic Outline’ use case, provide a keyword, and let the bot write your outline for you.
Sometimes using the blog idea & outline use case will provide a great article, however sometimes it will just spit out some not-so-great outlines, so it would be best for us to create our own outlines and go from there, or tweak the outline until you are satisfied.
4) Input Text / Command
When using the Magic Command function in Rytr, you are basically telling the AI what to write for you. This can be used in many different ways, but for this example we will keep it simple.
Tell Rytr to ‘write a list of blog topics about ____ ‘, and choose the niche or industry you would like potential topics on.
5) Choose Number of Variants
Select from the dropdown how many different variants (up to 3) you would like to have Rytr produce using the data you’ve provided.
You can either have it create multiple variants at once, or you can do it one at a time so that you are able to focus more on each output.
With unlimited word production from Rytr, you won’t have to worry about wasting words if you get poor output like some other AI text generators.
6) Select AI Creativity Level
A new function just added in Rytr is the option to select the creativity level of the output.
This can be very helpful in giving you either factual consistency or creative writing, depending on your needs.
Your choices for creativity level are:
- Optimal – Rytr default
- None (more factual) – The output text will attempt to be as factually accurate as possible
- Low – Slightly less factually accurate than None
- Medium – A reasonable middle ground for factual accuracy and creativity
- High – More creative and less factually accurate
- Max (less factual) – The output text will be a bit more creative and interesting, but can be factually inaccurate
For most cases, we can stick with the Rytr default (Optimal). However, if you are writing more creative fiction then you could consider changing into less factual creativity levels.
7) Select Ryte for Me
Finally, we are ready for the AI to do the work now.
If you are happy with all of your input, go ahead and click the ‘Ryte for Me’ button.
The software will take a few seconds to produce however many variants you choose.

Feel free to delete any poor topic outputs, and regenerate new topics as you please.
You can save a document specifically for your blog topic ideas to refer to for future posts.
Keep all of these functions in mind, as you will be using them to craft the rest of the page content as well.
Picking the Topic
Now that you have a list of potential blog topics, pick one to start with.
Take a moment to consider which topics work best for your business, and how you can provide value to the reader. Think about what call to action you will have, and the purpose of your blog post.
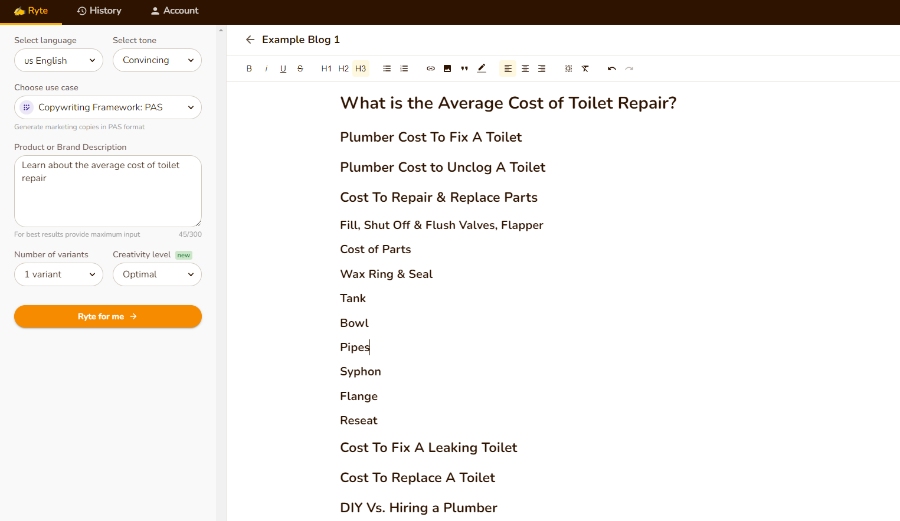
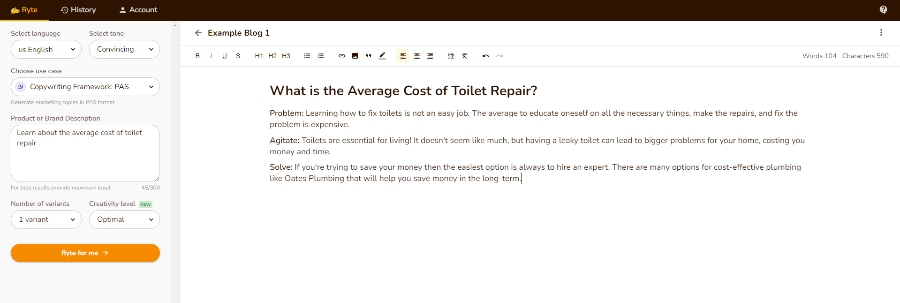
For this example, let’s pick ‘What is the Average Cost of Toilet Repair?‘.
I like articles related to cost because if you are a plumber, and someone is searching for ‘cost of…’ type articles, they are in the market for toilet repair services. You can convert this reader (or local readers in your service area) into buyers.
Consider adding what state and city you service to the title as well to help with local search intents.
Scoping Out the Competition
Every keyword and every article you will write will have likely millions of other results in Google. You need to know what pages are currently ranking, and then write a better article than that.
Take a moment to Google the title of your potential article and see what results come up.

Looking at the search results, we can gather a ton of valuable information on what a great blog post for this keyword is.
We can see that the #1 spot gets a rich snippet, making their result bigger than everyone else.
The titles vary a lot, so you won’t have to be too exact. However, no need to reinvent the wheel; try to mimic what the top dogs are doing.
The top spots in Google are also taken by some authoritative domains: Home Guide, Home Advisor, Fixr, Angi (formerly Angie’s List). It will be tough to beat these out without a great website, in-depth articles, and a lot of authority (in Google’s eyes).
If you don’t think that you will be able to beat out this competition, it would be wise to consider a different topic. For the sake of this article, we will continue on. After all, you don’t truly know what is possible unless you try.
Build up your website with amazing supporting articles and pages that link together, and over time it will grow into an authoritative website able to compete with larger entities.
Check the First (Best) Result
Click into the #1 search result – what can we learn from this article?
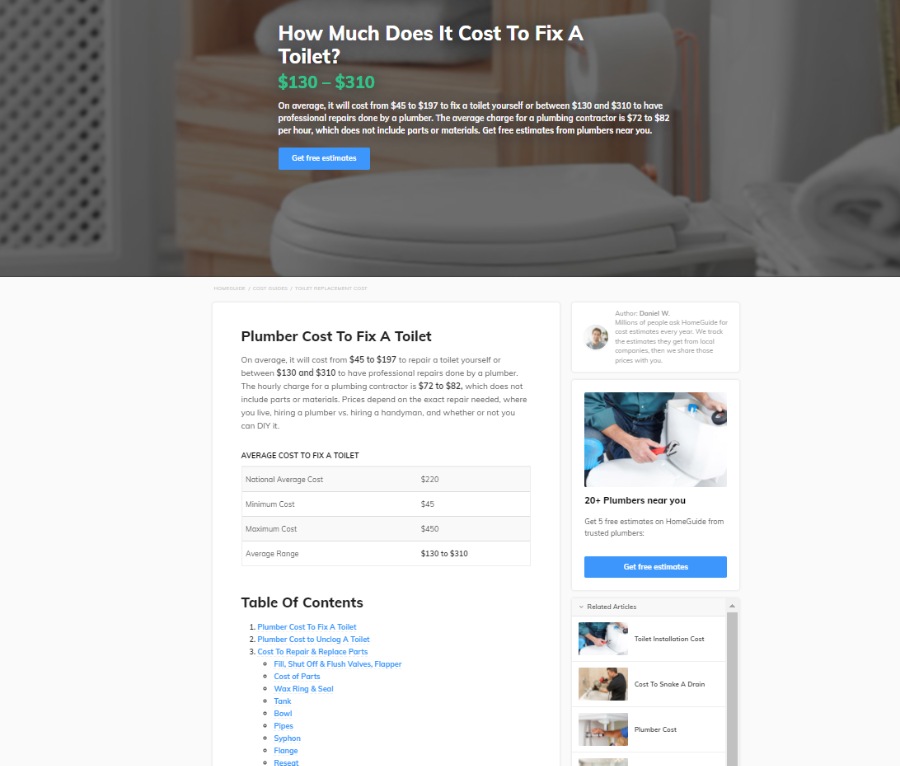
While we wouldn’t be copying the content from this page, we can take inspiration from their headings and other pieces of the page.
We can see they don’t beat around the bush, the costs are up front and straightforward.
The author (Daniel W.) has a profile picture and his bio provides a reason why he is qualified to write about cost estimates for HomeGuide.
There is a table with different average costs, as well as a ton of great headings we can see in the table of contents that we could use to write about in our own article.
They have related articles about the costs of different plumbing services, so they are definitely an authority on this subject, and have many opportunities for internal linking.
This is an extremely thorough guide that covers many different cost-related questions.
If you expect to beat an article this well put together, you’re going to need to cover all aspects of the costs of toilet repair. Unfortunately, this can be difficult if you are writing without experience.
The good part is that people have already wrote many of the facts for you. When we use AI, unfortunately the facts are not always correct and you will have to be able to do your own research to write a factually correct article.
The Anatomy of a Blog Post
Before even creating your blog post, consider what really goes into a blog post. Especially blog posts ranking on the first page of Google, like our example #1 spot above.
Let’s break down the essential components required for a great blog post.
- 1 H1 tag, which will be your blog title – make this a keyword you want to show up for in Google
- 1 featured image – set the alt-tag to be the title of your article / keyword
- Table of contents section – this is done easiest with simple plugins on WordPress
- Introduction to your article – use the same keyword in the first introduction paragraph
- Multiple H2 and H3 tags that support the main topic
- At least 3 images using proper keyword-rich alt tags that describe them
- Internal linking to 2 – 5 of your other pages / posts
- External linking to 1+ helpful, largely non-competitive websites you don’t own
- Any relevant frequently asked questions (such as ‘People Also Ask’ in Google search results)
- Conclusion paragraph reiterating the keyword and main topic
- An author section – show who wrote this, and why they have business writing for this industry (Google’s EAT update)
- Call to action / lead magnet – what can you do for the reader, or what can you give away for their information
- Related articles section – Instead of them reading this article and clicking away, entice them into other articles they might like
Make sure you are following the proper structure for your AI written blog posts to be successful.
Starting the Blog Post in Rytr
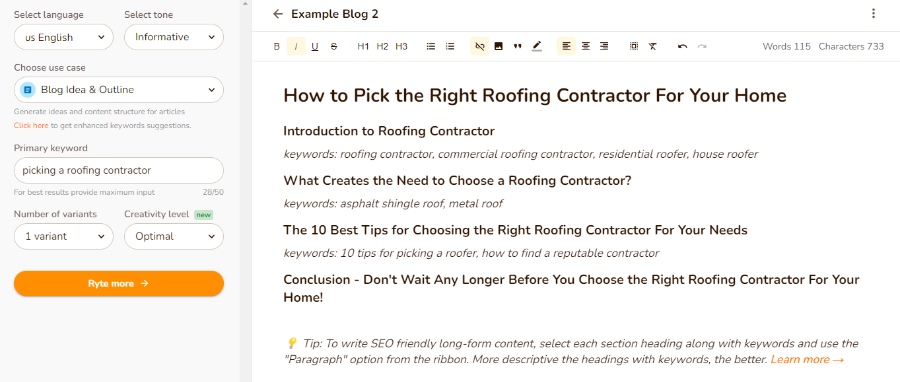
For this article, let’s star the blog post by copying the headings and just paste them into our Rytr software for now, and set them to H2 headings, with ‘parts repair’ headings being H3s.
Don’t worry, we won’t be plagiarizing this page. You will not get anywhere by simply copying and pasting other people’s blog posts.
You can choose to remove or change any headings at will depending on the type of blog post you want to craft.
Also consider adding in your own additional headings with more information to beat out our competitors.
Writing Paragraphs in Rytr
Now that we know what an already successful blog post for this keyword consists of, there are (at least) two ways to go about building the actual paragraph content for our blog post.
Method 1: Highlighting Headings & Using the ‘Paragraph’ Function
To begin, let’s tweak the titles on these headings.
We’ll make them longer and more descriptive. This helps us two-fold:
- We will have more long-tail headings / keywords
- We can use the Rytr paragraph function to highlight the headings and add paragraphs automatically
The Rytr AI needs to know what kind of output we expect from it. So let’s change these to something longer so we can get better paragraph data out of the software.
This turns the heading ‘Wax Ring & Seal’ into ‘how much does it cost to repair a wax ring & seal on a toilet’ – the overall idea we want answered in our generated paragraph.

Highlight that longer heading and then select ‘Paragraph’ from the functions list in the Rytr app.
It’s not unlikely that you can get some garbage output; simply try again with the same data or tweak your heading, tone, and creativity level until you can get an output you desire.
Make sure to do some of your own edits or checks for factual accuracy as well.
Method 2: Using ‘Magic Command’ to Write Paragraphs
To use the Magic Command function, simply write down your command. The more descriptive, the better.
For this example, we’ve used the following command:
“write a paragraph about how much it costs to repair a wax ring and seal on a toilet”

The AI isn’t a genius writer, and sometimes you will get back content that you just can’t use, or is unrelated. There’s no avoiding this in any of the many AI text generation software available on the market.
Consider changing your command up to be more descriptive, and tweak which tone and creativity level you use.
For this paragraph, we had to lower the creativity level to ‘Low‘, and we used a ‘Convincing‘ tone.
We also had to tweak some of the text around to make it more accurate and explain what we needed, however the software gave us 90% of our usable text.
Depending on your use, you may or may not want all of your headings to stay that way.
Once you’ve finished, you can simplify the headings. Try to make them different from your competitor.
Use Cases that Work the Best for Blogs
I have found that using different ‘Use Cases’ for different sections of the blog can work great together.
Introductory paragraphs can be written easily using the copywriting framework use cases:
- AIDA: Attention – Interest – Desire – Action
- PAS: Pain – Agitate – Solve
There are a lot of different ways to write using the copywriting framework, and it can create great paragraphs that draw the reader in, and provide a call to action for your article.
Try several different inputs and different copywriting framework use cases, as well as mixing up the tone to match your intros to a paragraph that matches your intentions in the article.
Checking for Plagiarism
The Rytr AI text editor software makes it extremely easy to check for plagiarism in your content.
Simply select a bulk of text, click the ‘More’ button and then select ‘Plagiarism’.
Rytr will scour the internet for the same content that could get flagged for plagiarism by any other checker.

In our hundreds of thousands of text generated words, very few bits of text have ever come up as plagiarized content. This tool itself is a lifesaver for content marketers, especially when you’re building your blogs with AI text generation software.
Creating Supporting Graphics
No blog post is complete without supporting graphics and imagery that help describe and explain your article.
Depending on your industry, this could be easy or difficult.
If you are a plumber or a service-based business writing about your industry, you will most likely need to find stock photos about your industry.
Some of the best free stock photo websites for this are:
For more premium paid stock photos, I would highly recommend Adobe Stock if you (or your client) has the budget to pay for stock imagery.
If you are writing about software, websites, or digital tools, you can simply use screenshots and web captures to create your own images.
To make your blog and images look more unique and less… stock photo-ish, you can mildly edit them in a simple photo editing software like Pixlr.
Consider adding brand colored borders, arrows, collages, and more to help your images stand out, and potentially rank in Google image search.
For publishing your blog post on social media, consider using an AI-powered graphic and social media publisher like Ocoya to handle all of that for you. Visit the Ocoya website here.
Selling and Sharing Content with Your Rytr Profile
Now that you have an in-depth guide on how to write a blog post with Rytr that can rank in Google, you can put your skills to the test while getting paid with new Rytr Profiles.
What is Ryting profile?
One of the most important ways that you can show off your new AI copywriting skills is with a personal Rytr profile.
Not only is it a lot easier to share your portfolio with people, but it also has its own easy-to-use design and structure. A majority of writers seem to prefer this approach because it saves time and effort in the long run.
The creation of Ryting profiles is an attempt to fix this.
Why should you activate your Rytr profile?
- Make your Brand stand out: creating a public page is a good way to make sure you are recognized amid the sea of content writers
- Showcase your best work: from articles to website copies, you can highlight your best work and attract more eyeballs
- The best Rytrs will have the opportunity to work with clients directly and make money.
How does it work?
Once you sign up for the profile, you will be able to share your personal URL anywhere and start getting discovered by potential customers.
- Sign up for Rytr here
- Go to the ‘Account’ tab at the top when you get inside the Rytr app.
- Go to ‘Profile’ and select ‘Create Profile’ and add in your basic profile details such as a username, bio, a photo, or anything else you want people to know
- To open documents in your dashboard, click the icon that looks like three dots (•••) under each doc. This icon opens a menu with different options for editing and opening a document, as well as pinning it to your profile page.
- Keep sharing your work to be discovered by clients and reap the rewards.
Additional Tips for Writing Your Blog Posts with AI
Here are some additional things you should be thinking about when writing your blog posts with AI.
- Have a plan: know what you’re writing about, and what the goal of the article is
- Know that you will need to constantly tweak the input and output of the software to get your desired results
- It takes a lot of practice and patience
- Consistently create and upload amazing content to your site and you will be successful over time
Now that you know how to write a blog post with Rytr AI, use this knowledge to create your own amazing successful website(s) and save tons of hours and thousands of dollars creating content with this affordable software.
Sign up for Rytr using our links and reach out if you need any assistance.