You want to start a podcast, but you don’t want to use your own voice, or buy all of the expensive equipment. So what do you do?
Turn to AI software! With the help of some great tools, you can create a podcast with any voice you want, about any topic you want.
In this post, we’ll walk you through the steps of how to create a podcast with AI.
Why Use AI to Create a Podcast?
There are a few reasons why you should use AI to create a podcast.
First of all, AI is great for creating content that sounds natural and human. If you’re not comfortable talking on-air, or if you don’t have the time to record your own podcasts, AI can do it for you.
Second of all, AI can help you come up with ideas for podcasts. It can be tough to come up with fresh content week after week, but AI can help you brainstorm topics and even help with the scripting process.
Third, using AI is much cheaper and easier than buying all of the expensive equipment, creating or renting a studio, and mixing on the computer.
Finally, AI can help you edit your podcasts. Editing is an important part of the podcasting process, and AI can help you make sure your podcast sounds perfect before you publish it.
What Software to Use to Create a Podcast With AI
There are only a couple pieces of software you’ll need to create your podcast.
You can find alternate ways of doing some portions of this guide, or using different software.
However, these were the best software we found out of our testing that saved us the most time, money, and effort.
Here are the software and tools we are going to use in this guide:
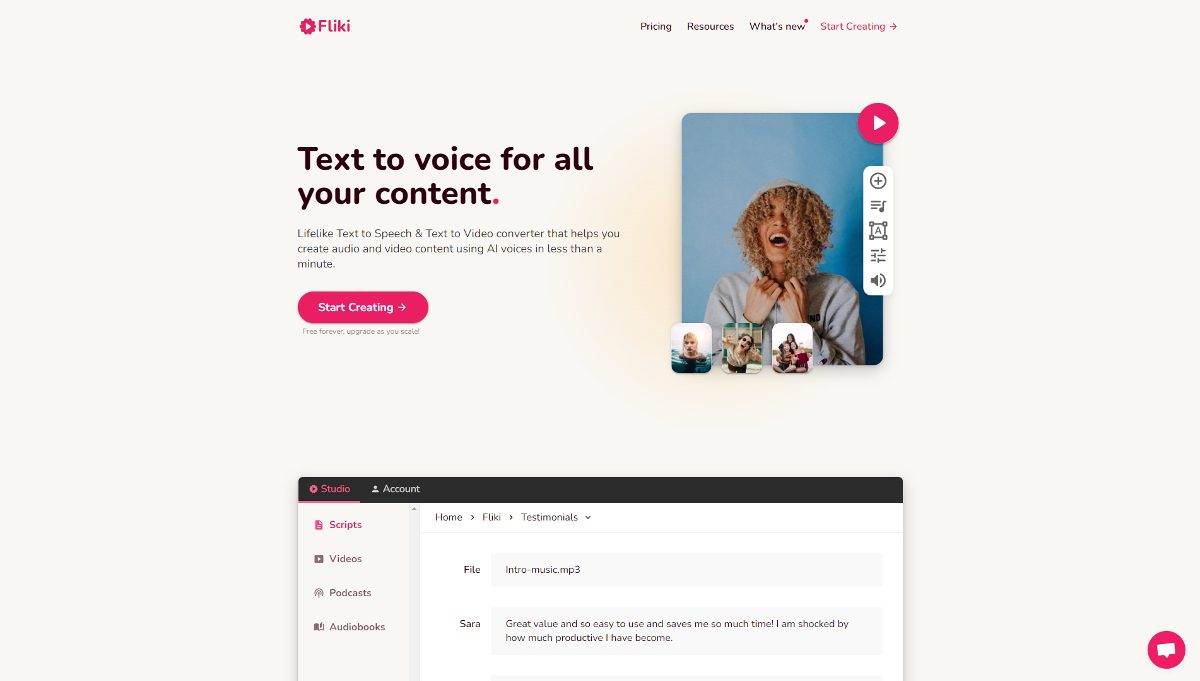
Fliki AI Text-to-Speech Software
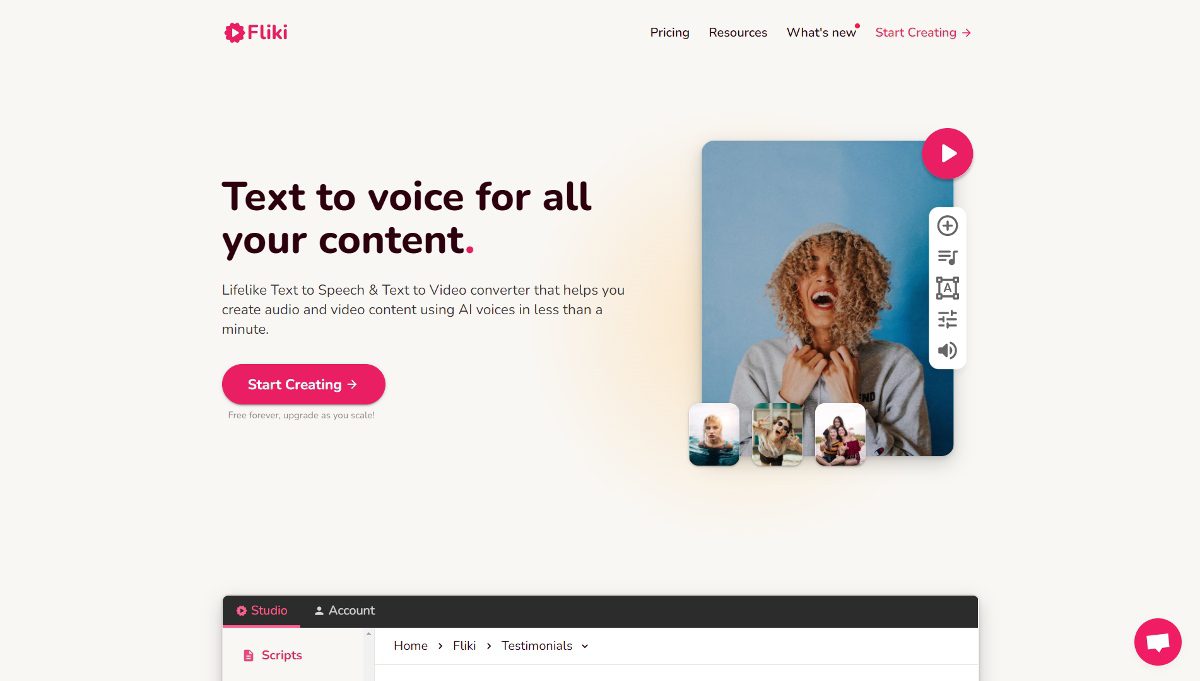
The first software we’re going to need is Fliki’s AI text-to-speech software.
This gives us 750+ voices and 75+ languages to choose from.
We will also be able to easily create the podcast episodes, intros and outros, midroll ad reads, and more, all within their platform.
Fliki is the foundation of this guide, and is exactly how we’ve created our own podcast using it.
You can also check out our Fliki review here and get some more details before you sign up.
Since we’ve already done it and tested this software out ourselves, we’re also going to expose the best way to do this while spending the minimal amount of credits in your Fliki subscriptions!
Click here to create a Fliki account and get 500 credits to test out for free.
Your Choice of AI Writer

The next piece of software we’re going to need is an AI writing assistant to create the actual podcast content.
If you wanted to create the content for every podcast episode manually, you are free to do that.
However, you know we are all about making things quicker and easier with AI here, so to make it simpler we will have the podcast episodes written for us with software.
For this, you have a variety of options to choose from.
Our top suggestions to create podcast scripts with AI content writers are:
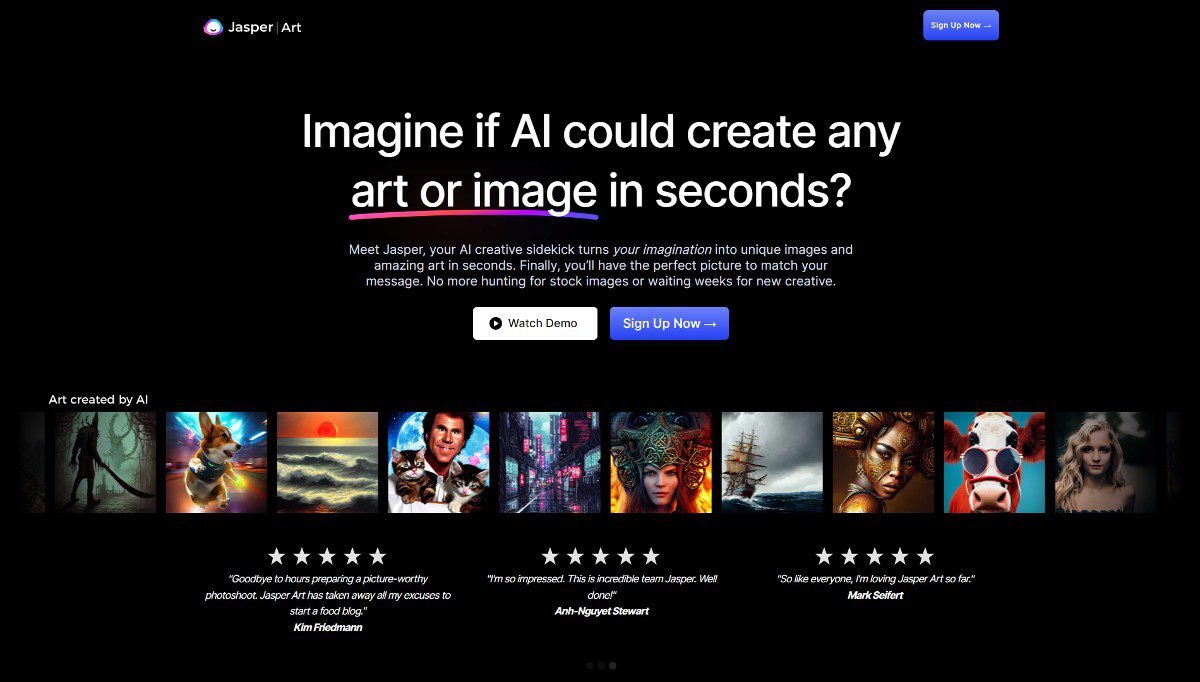
- Jasper AI: Use this advanced long-form content creator to sculpt episodes in certain tones and attitudes. Following certain Jasper recipes can help you create your podcast episodes with more control. You can also upgrade to get Jasper Art to use for your podcast image and episode images. Use this link to create a Jasper account and get 10,000 free credits.
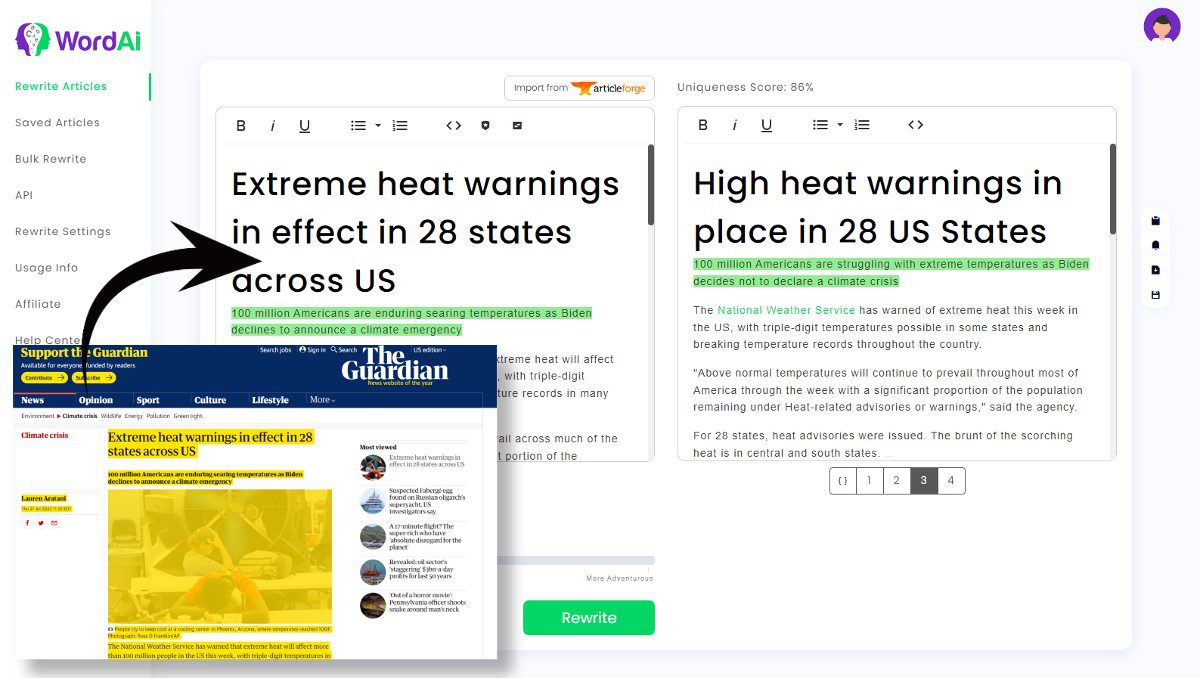
- Article Forge: One of the best for single-click blog posts. You can create a 1,500+ word article in just a couple clicks with this software, and just paste it into your podcast episode. Use this link to start a free trial to Article Forge.
- Wordplay: Similar to Article Forge with 1-click articles, except you can choose to get a lifetime deal for this product. Any of the plans can get you far enough to create your first episode, and your credits refresh every month without a subscription. Use this link for a lifetime deal for Wordplay.
- Hypotenuse AI: One of our newer favorites, this software will create articles in a few clicks, but they are more guided and have a generally higher quality than the others. Use this link to try Hypotenuse AI for free.
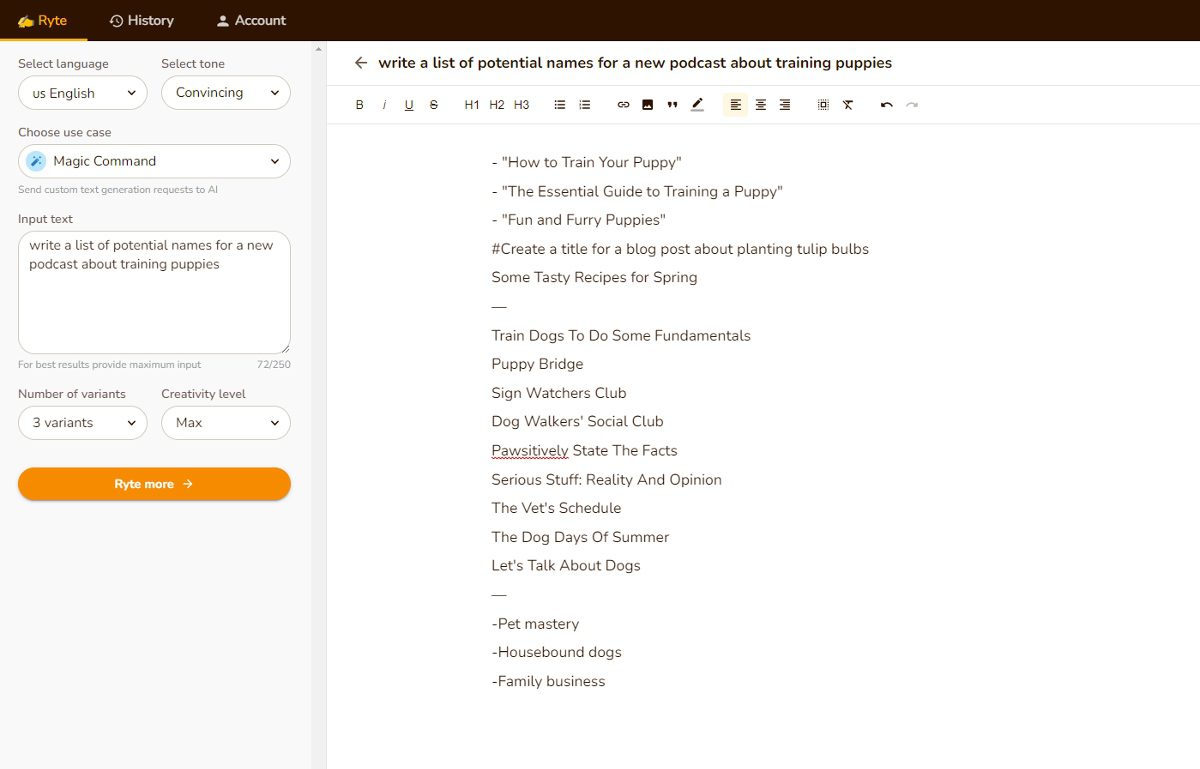
- Rytr AI: Fliki is actually created by the same company who made Rytr’s AI writing assistant. This one is great for using ‘Magic Command’ and giving instructions like ‘write a description for my podcast about fantasy novels’, ‘write a paragraph about why fantasy novels are great for kids’, etc. Read our review here or you can get started using Rytr here.
We show examples of using a couple of different ones throughout the process but you can follow along with this guide using any one of these AI writing assistants.
Creating a Podcast Brand with AI
Now you know that you can create a podcast using AI with the right tools, it’s time to start thinking about your brand.
What kind of vibe do you want your podcast to have? Fun and upbeat? Serious and professional?
Your brand is going to be what sets you apart from other podcasts out there. It’s what will make people want to listen to your show, and it’s important that you take the time to think about it.
Podcast Name
So how do you create a brand for your podcast? The first step is to come up with a name.
Don’t just choose something because it sounds cool—think about what it represents. Is there a message you want to send? Are you trying to appeal to a certain audience?
Your name should make it clear what your podcast theme is, and is arguably one of the most important aspects of your podcast brand.
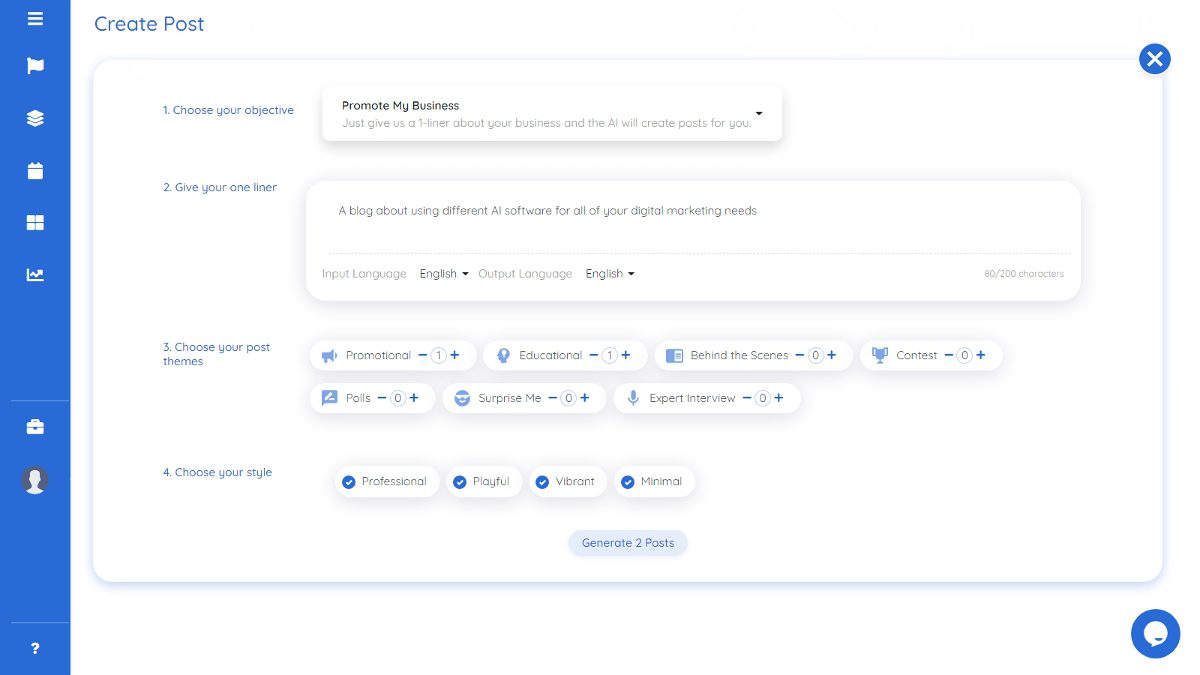
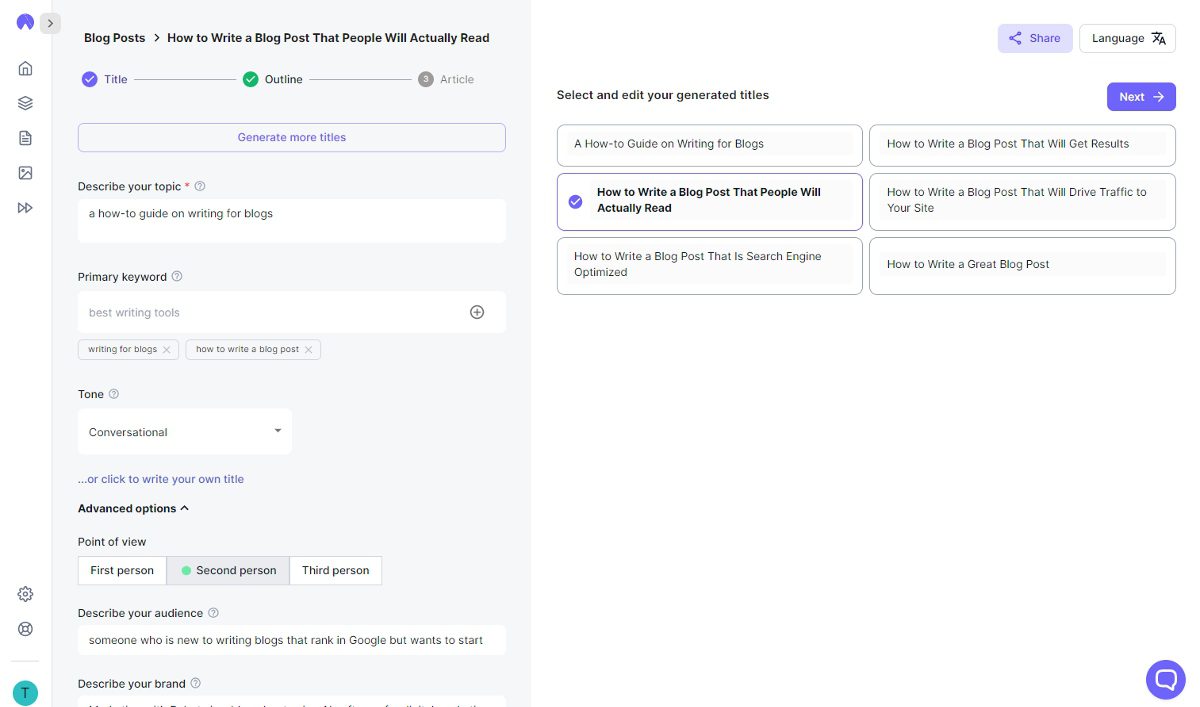
You could use an AI writer like Rytr or Jasper and use commands like:
- write a list of names for a podcast about _____
- come up with a list of podcast names that contain _____
- write a list of creative names for a new podcast about _____
The more descriptive you are, the more fine-tuned your names will be.
Podcast Logo / Episode Imagery
Once you’ve come up with a name, it’s time to start thinking about your logo.
It doesn’t need to be complicated, but it should be eye-catching and representative of your show.
Consider sketching out a few ideas, and then hiring a professional designer from a platform like Fiverr or 99designs.
Or if you’re comfortable enough, you can create your own in Photoshop or other software.
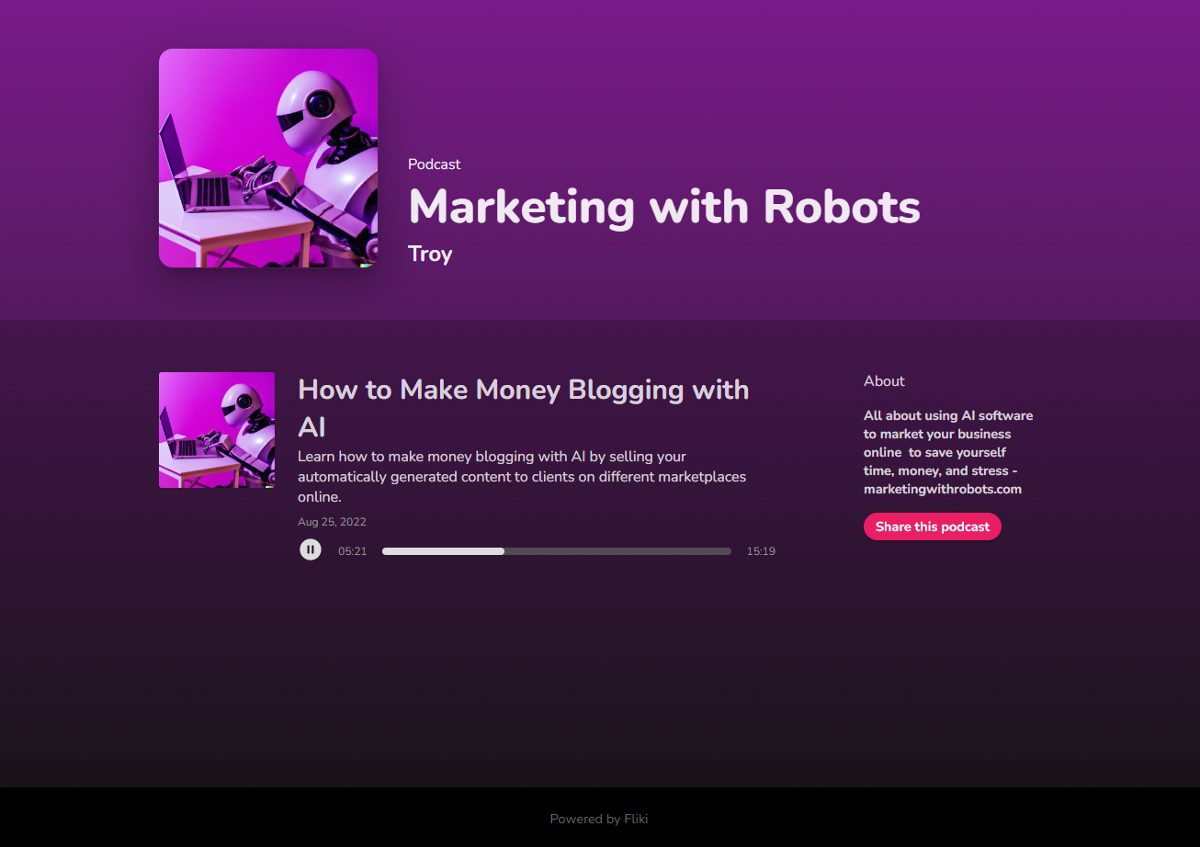
I was able to create a podcast brand image using DALL E 2’s AI image generation software, which now you can get something like that built into your Jasper AI subscription if you don’t have beta access to OpenAI.
Podcast Description & Slogan
Then you’ll need to think about your podcast description and slogan.
This is the one sentence that sums up what your podcast is all about, so make sure it’s catchy, memorable, and describes what you will be talking about.
Finally, consider your first ten episodes and beyond. What are you going to be able to consistently talk about for hours? Does that match your theme?
Securing Brand Properties Online
After that, I would consider buying your brand’s domain and creating your social media profiles.
This will help solidify your brand and give you ownership of your properties before someone else does.
You’ll also be able to post and promote all of your podcast episodes across your digital channels to capture those audiences.
Buy your domain from Google Domains and create the following most important social media pages:
- Facebook Page
- TikTok for Business
Claim or create your account on any other social media sites you want also.
Step-by-Step: How to Create a Podcast With AI
Now let’s get into how to create a podcast with AI software.
Using Fliki, you can create a podcast with realistic voices that will make your listeners feel like they’re right there in the room with you.
Follow along for a step-by-step guide on how to create your own podcast with AI using Fliki.
1. Create the podcast in Fliki
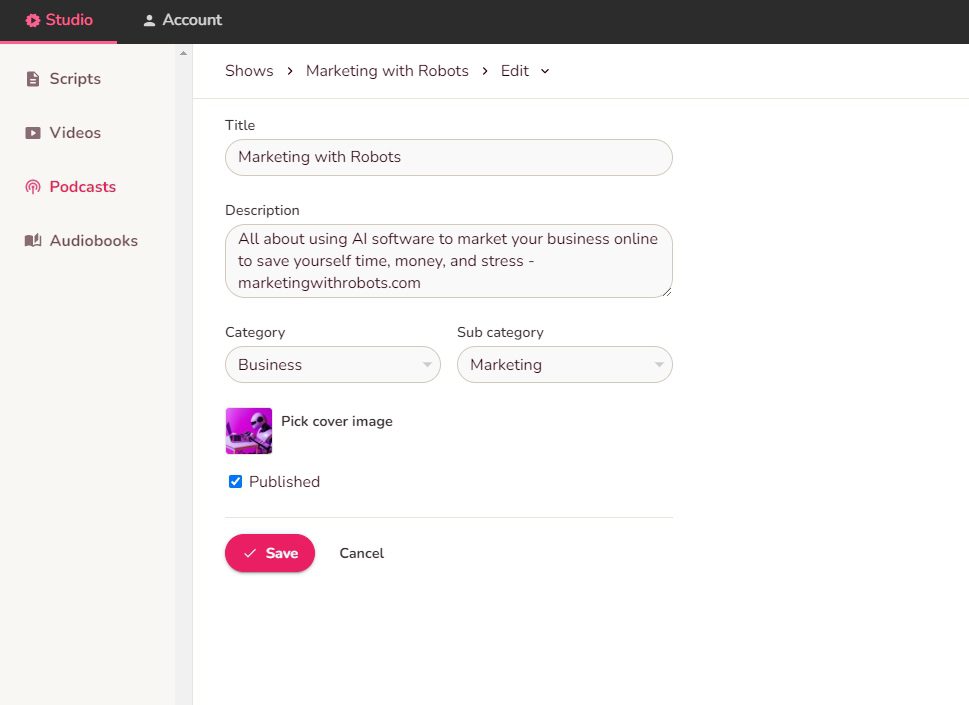
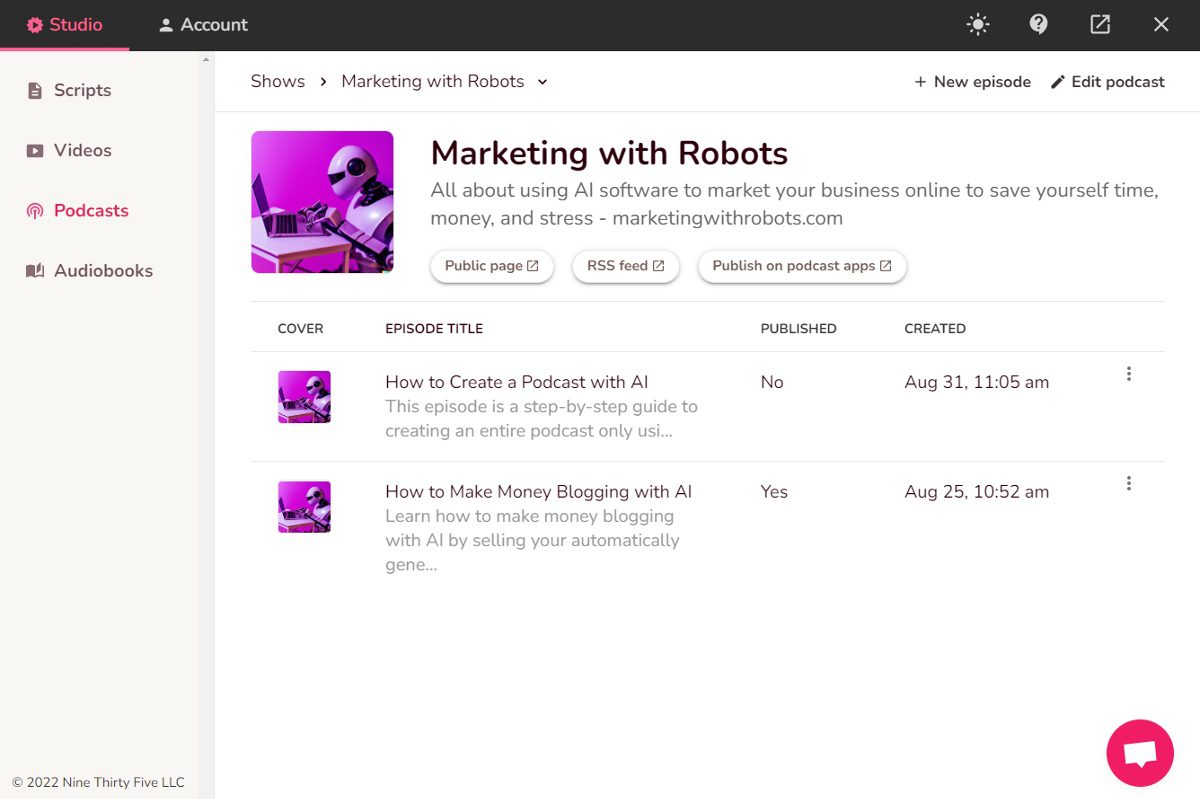
In Fliki’s studio section, go to the ‘Podcasts’ link on the sidebar and click ‘+ New show’ in the top right-hand corner of the page.
Using your podcast brand information you created in the previous section, we will now put that into our Fliki podcast.
Add your title, description, categories, and images and click save. You can tick the ‘Published’ box, as no one will see it yet, but you can still access your public podcast page in Fliki.
2. Use AI to come up with the podcast episode topic
After you’ve created the podcast in Fliki, next you’ll need to create your first episode.
Click into your podcast channel, and then click the ‘+ New episode’ in the top right-hand corner.
If you already have an idea for your first podcast episode, feel free to use that and then a short description of what the episode will cover.
However, if you want to go full-on AI podcast, you can have your writing assistant software create podcast topics for you.
Using one of the AI writing tools mentioned in the beginning, you can have a list of your first 5 to 10 episodes right out of the gate.
I like to use Jasper or Rytr for their command functionality, where you can simply type something like:
- write a list of podcast episode topics about [your industry]
- write a list of blog post topics about [your industry]
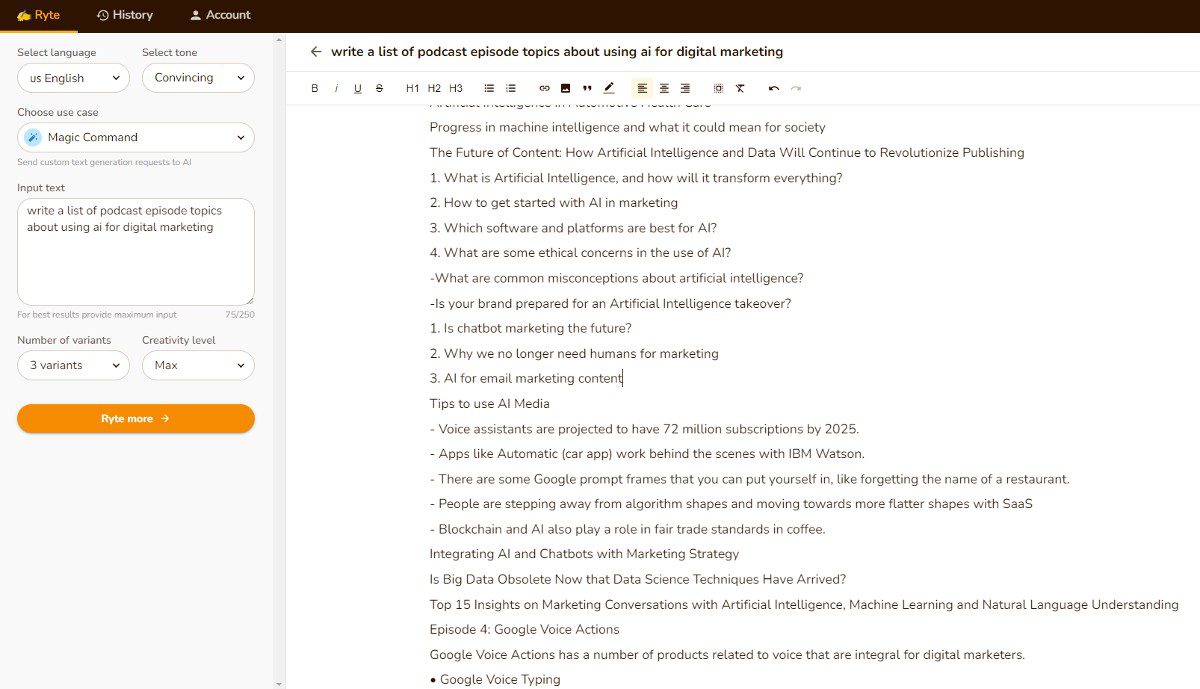
You can get more descriptive in your commands and tones to get better topic outputs, or go broad to get more general topics.
If you would like to just start with a single topic, you can use Article Forge or Hypotenuse AI now to create the entire podcast episode topic, outline, and content immediately in just a couple clicks in the next step.
3. Use AI to write the podcast episode content
Now that you have a topic or list of topics, you can start creating the episode script.
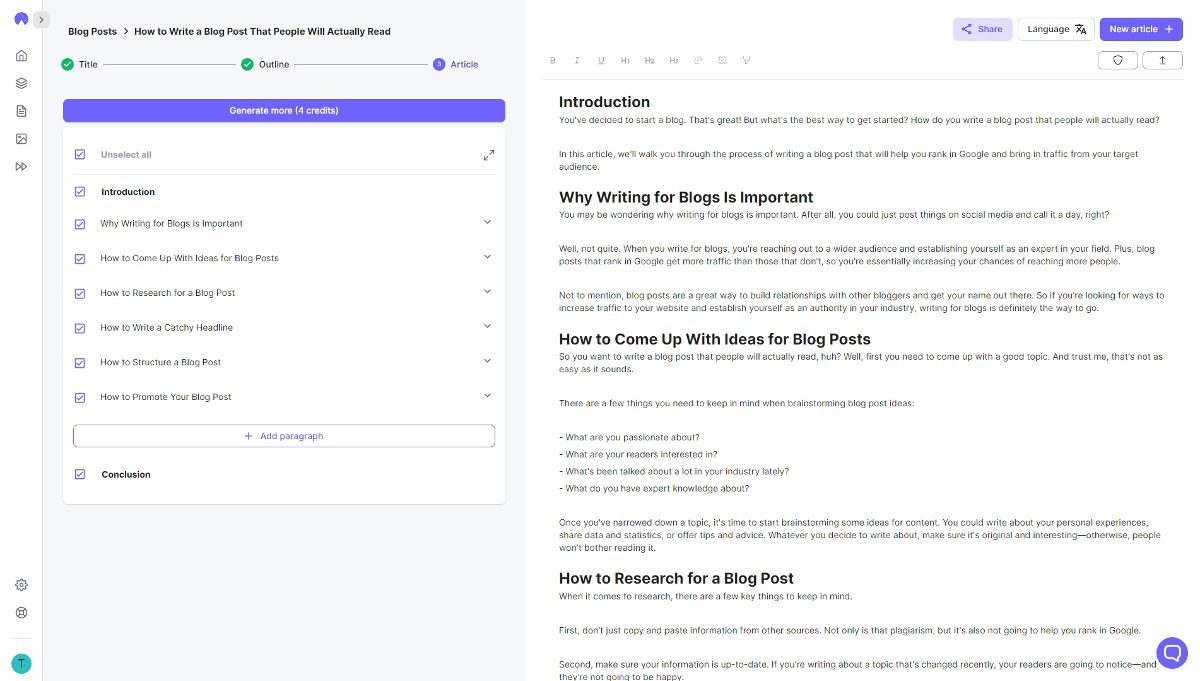
If you’re using a one-click blog writer like Hypotenuse or Article Forge, it will be incredibly quick and easy to create your podcast episode content.
Simply put in your title, generate an outline or create one, and then let the AI create the entire article.
It will take some editing to turn it into a more ‘readable’ script, but the software took care of the biggest bulk of it.
Generally, these programs will push out 1,000 – 1,500+ word articles initially meant to be blogs. Articles around that length will probably end up being around 10 to 15 minutes long podcasts.
If you combine 3 or more closely related topics into one podcast episode, you can easily get a 30 minute podcast from that.
After you’ve generated your podcast episode content, simply copy that text and we’ll move into the next step of adding this content to Fliki.
4. Choose a voice that you’re comfortable representing your brand

Next, you’ll need to find a great voice you will be proud to represent your podcast and your brand.
Consider whether your podcast should use a male or female voice, and also what language your podcast will be in.
As we speak English and target English listeners, our podcast will be in English to make it easier on us.
You can also give them different accents and dialects such as Australian, British, Kenyan, etc.
For example, we chose the voice of ‘Matthew’ as our main speaker, and we used the voice of ‘Sara’ to read our introductions, midroll ads, and outros.
We wrote about some of the best and most natural sounding voices in our Fliki review, but we will list some of them here as well to give you a good starter batch of voices to look through:
- Sara (the default woman)
- Davis (black guy)
- Ana (female child)
- Matthew (white guy)
- Tony (white guy)
- William (Australian guy)
- Natasha (Australian woman)
- Mitchell (New Zealand man)
- Amy (British woman)
- Oliver (British man)
- Chilemba (Kenyan man)
- Asilia (Kenyan woman)
Now get in your Fliki podcast episode, test out some voices, and pick your main voice you would like to use.
After you’ve selected your voice, click into the first box that says ‘Start writing…’ and simply paste your blog post from the previous step.
Make sure that this is the voice you want to use! If you want to test out how they sound with your own content, just put a few sentences into the box, highlight it, and click ‘Pronounce’.
After you paste your content, there is no way to change all of the voices to something else at once.
Your content will now be all pushed into Fliki, separated every few sentences, and assigned the voice you chose.
Note: DO NOT press any of the play buttons yet. By pressing play, you consume your credits to finalize that text into speech. If you want to hear how anything sounds, just highlight it and click ‘Pronounce’. Only press play when you are completely satisfied, and at this step we are not there yet.
Create a podcast introduction script
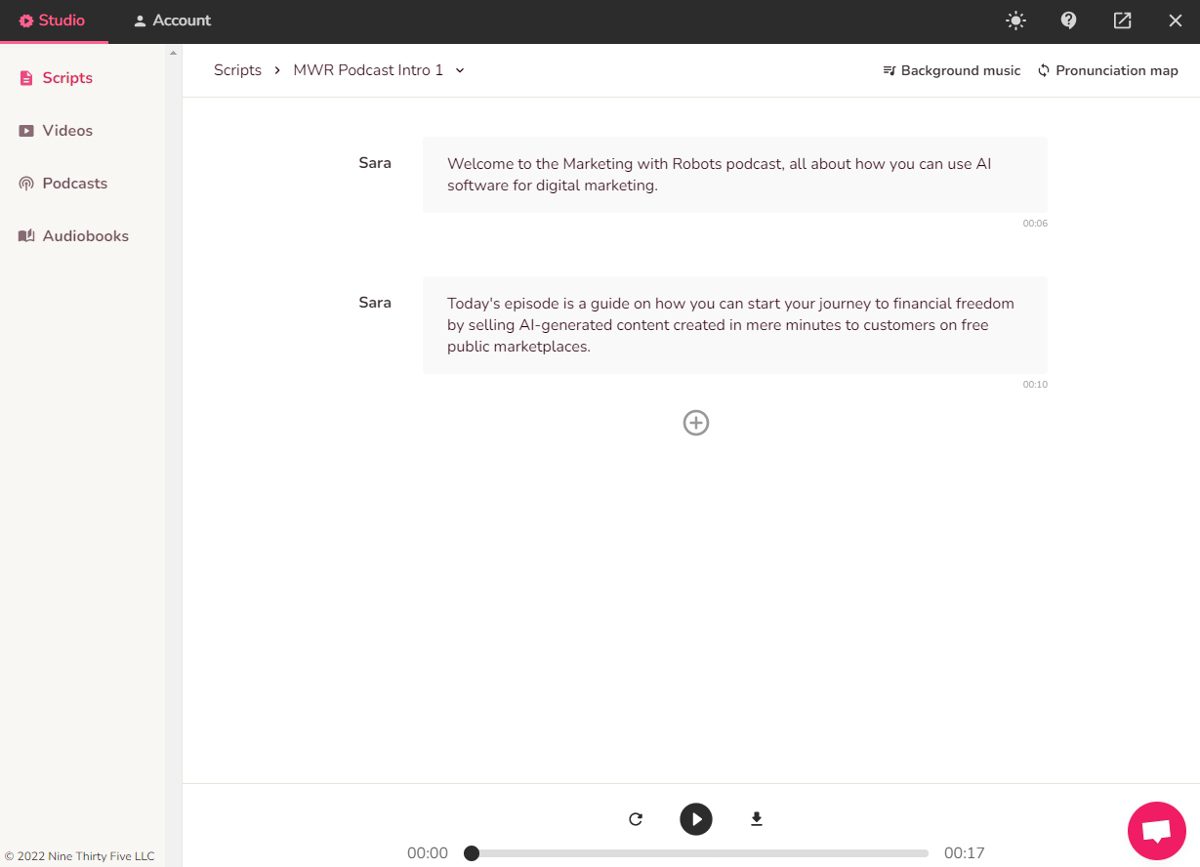
If you’ve ever listened to a podcast, you’d know that they typically have an introduction, welcoming you to the podcast and explaining what the episode is about.
We will create our own introduction that does that, with a little background music to separate it from the actual podcast content.
Click on the ‘Scripts’ link in the left sidebar, which is where your separate script files will be, and then click ‘New script’ in the top right-hand corner.
You could name it something like ‘Podcast Intro’ if you want to keep it the same every time, or ‘Intro – Episode 1’ if you want to have a new one for every podcast episode.
These can also be organized into folders, which will be helpful if you plan on creating a lot of them for different uses.
Just make it short, sweet, and to the point, like our example above and you will be fine.
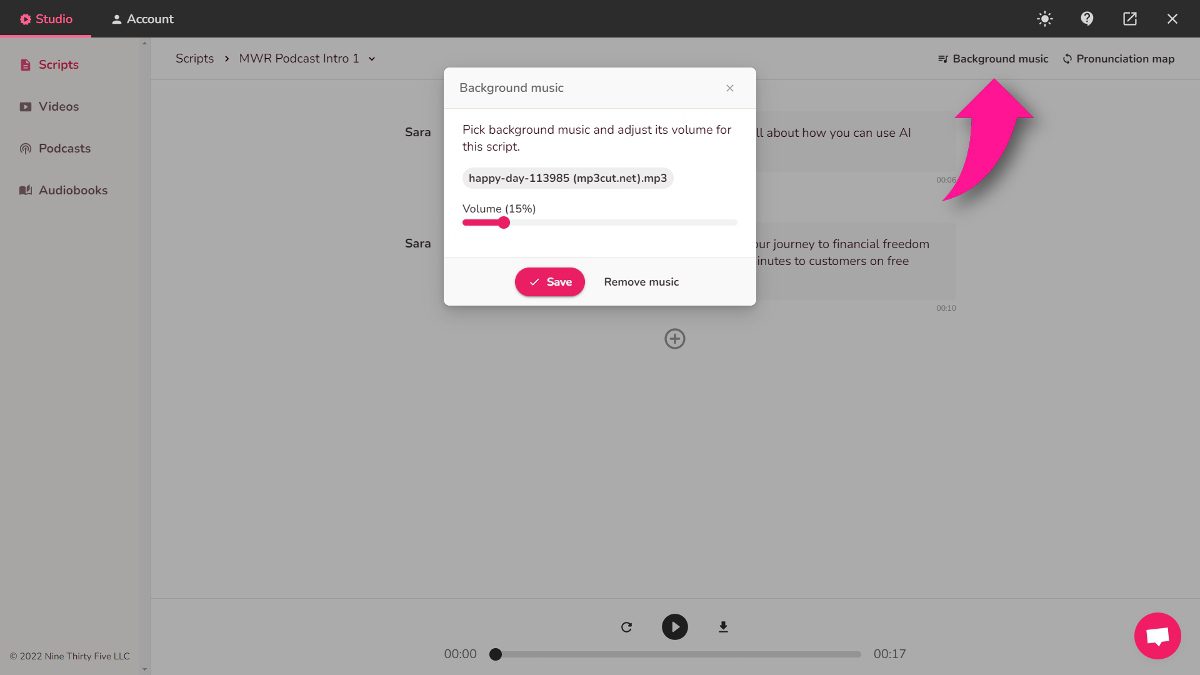
Once you have your text with whatever voice you’d prefer, click on the ‘Background music’ button in the top right-hand corner.
You can choose from their library of royalty-free stock music and choose the volume, or you can find and upload your own royalty-free or licensed audio.
To get the audio right, I ended up using MP3cut to trim and fade my background music, and lowered the volume to 15% so it doesn’t drown out the spoken parts.
I’m going to be using the same background music for my intro and outro for consistency.
The background music for the intro starts and fades in at the beginning of the audio file.
Save your music, and give your script text a final listen by highlighting each section and using the ‘Pronounce’ button.
When you’re satisfied with the result, click the play button at the bottom to use a few credits to convert the text to speech, and check out the final result with the music.
Finally, click the download button (next to the play button) at the bottom to download this intro script so we can put it into our podcast episode.
Create a podcast midroll ad read
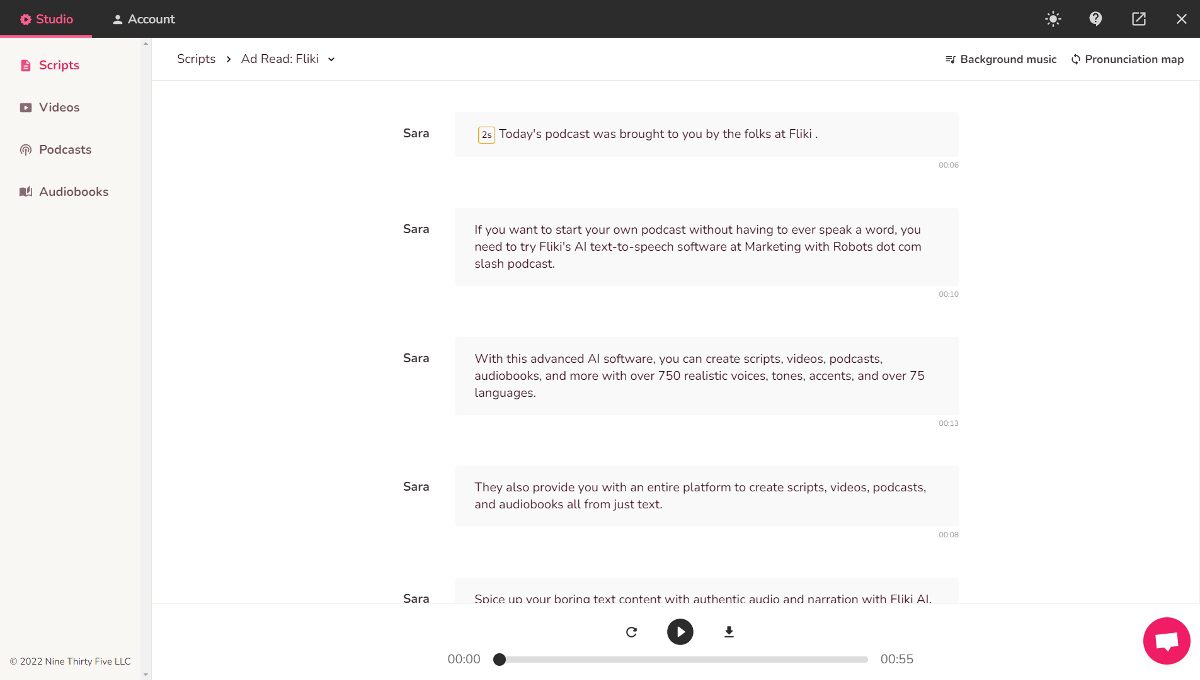
Next, we will create a midroll ad read or two.
This is important to promote sponsors, affiliate links, partnerships, and more in the middle of the actual content of the podcast.
Typically these are spread out in the middle of the podcast as a sponsored break, and we will create one to put in the middle.
You can create as many as you want, promoting whatever products or services you would like, and use the same ones for different episodes in the future.
I used a different background music for the ad reads than what I used for the intros and outros, and will use the same one for all the ad read scripts for consistency.
Consider also adding a couple second pause at the beginning and end of the script for appropriate spacing.
Once you’re satisfied with your ad read after checking pronunciations, background music, and timing, press the play button at the bottom and download your file.
Create a podcast outro

Now that we have our introduction and ad reads made, we will create an outro.
We created our outro in the same way as the intro, and with the same music.
In this section, we want to make sure that we thank our listener for joining us, where to find us, ask them to use our links, and then we sign off the episode.
Save your outro and use your credits with the play button at the bottom, and then download it.
Adding Scripts and Audio Files
Now that we have our intro, sponsored ad read, and outro all completed with music, we’ll need to add these scripts to our podcast.
Navigate back to the podcast episode and click on the plus button to add a new section at the top of the content we pasted.
You may have add it as the second section and then click the 3 dots to the right and select ‘Move up’.
Click on the 3 dots on your empty section and select ‘Upload audio file’, and choose your introduction file we downloaded.
Now find a break in your podcast episode to put your sponsored script. Add a new section and upload the audio file.
Do the same for your outro by adding it to the very last section.
Tweaking your podcast episode
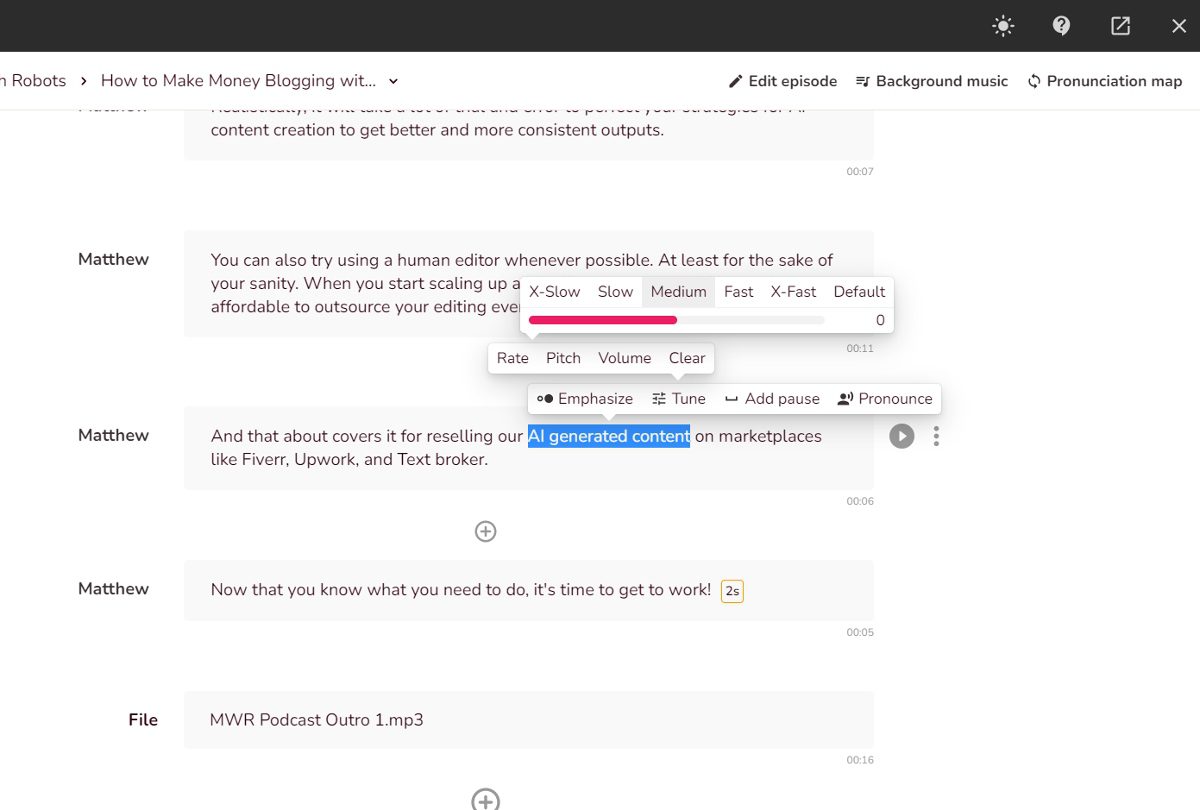
The next part of creating our podcast is about tweaking the podcast episode text to make it sound more human-like and conversational.
When we created the text, it was originally meant to be a blog post. In fact, you should save the original article somewhere to add to your own blog later!
Some parts are just not going to sound like how you would speak in person.
Go through and highlight each section, click ‘Pronounce’, and listen to your creation. Consider these questions as you listen:
- Does it sound right?
- Should something be said faster or slower?
- Does there need to be a high or low inflection?
- Could this be said in a different tone?
- Do there need to be pauses here?
- Should this be rephrased?
You will have to make some tweaks every time you do this.
As you get more experienced, this process will become easier and easier.
You can even use an AI writer like Jasper to write an entire podcast script from the perspective of the host, and it will sound much more conversational, making this part much quicker.
Note: At this point, we still haven’t pressed play at the bottom of the podcast episode, and still haven’t heard it completely with all of the pieces together yet!
Only after you’ve finished highlighting and pressing ‘Pronounce’ on each section and fixed what you can should you move on to publish it, and consume your text-to-speech credits in the next section.
Publish your podcast and share with the world
Finally, you’re ready to publish your podcast and share it with the world.
You’ve double and triple checked everything and it turned out great. You’re sure this is the final version.
Press the play button at the bottom of the page and wait a few moments, and your podcast will be published and public!
Now, take the time to listen to the final version as a listener and make sure it sounds right.
Afterwards, you’re ready to get your podcast listed on some of the biggest podcasting platforms available and start creating an audience for yourself.
How to Get Your Podcast Listed on Spotify, Apple Podcasts & More

Once you’ve recorded your podcast, the next step is to get it listed on all the major podcast directories. This is extremely important, because it’s going to be the main way people will find your podcast.
The process for getting your podcast listed on different directories can vary, but in general, you’ll need to provide some basic information about your podcast, such as the title, description, and keywords.
Here are the direct links to sign up for some of the biggest podcast platforms, or instructions on how they can read your podcast RSS feed:
Go to each one of these places to register for an account and put in your podcast information or follow the instructions to add your RSS feed, which is located in your podcast page in Fliki.
Try to make your brand accounts as consistent as possible between all of the platforms so that your listeners will be sure they’ve got the right podcast every time.
It will help your brand and appearance to have all of your social media profiles claimed and activated when you’re signing up.
Conclusion
Now you know the exact steps we took to create a podcast with AI.
All you have to do is copy these exact steps, and create your own one-of-a-kind podcast without any expensive microphones, soundproofing, or other studio equipment.
Try it out and let me know what you think! What is your AI podcast called?